
Whether you’re entertaining for two or ten, a well-made charcuterie board can be the perfect snack – or a whole meal! The market is full of ingredients perfect for such occasions, but we turned to the experts to get you a guide to making your very own charcuterie board at home. The best part? You can find all the ingredients by shopping in-store or ordering home delivery from Bridge Street Market!
Enter: Chesley Thorn from Say Cheese GR! Say Cheese GR is a local charcuterie board company, personalizing meat and cheese boards, brunch boards, and more for any occasion.
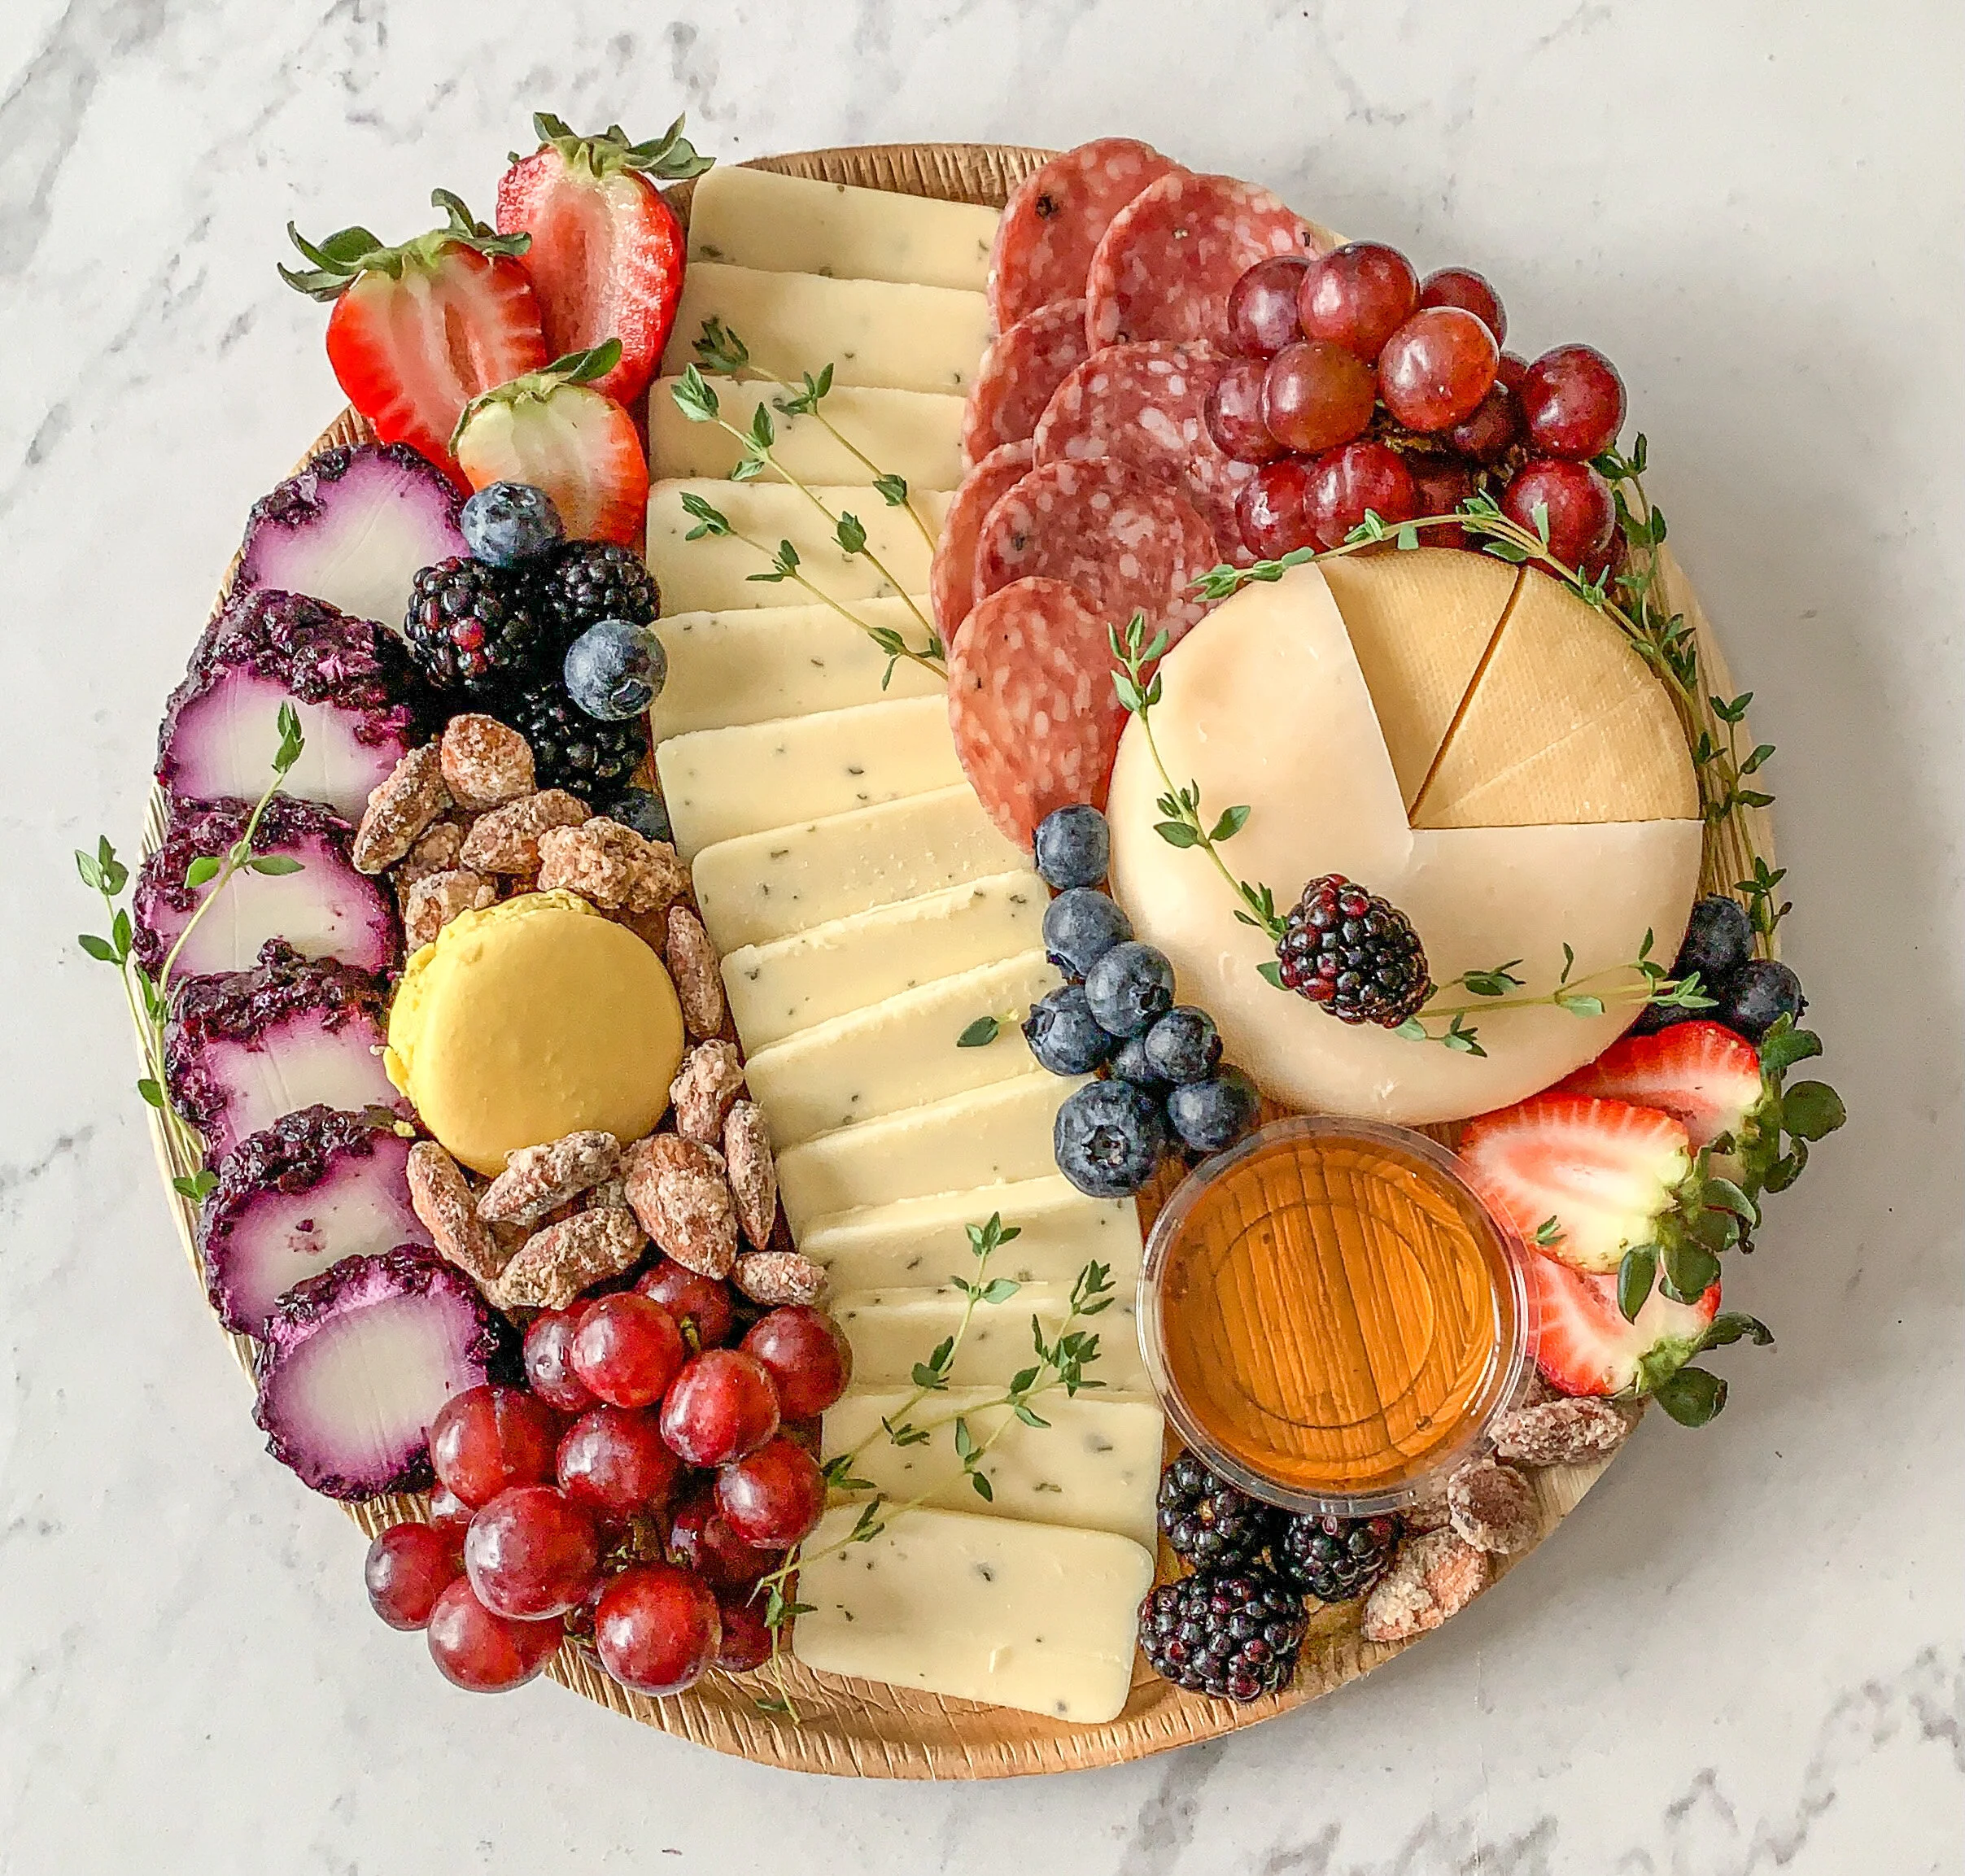
Ready to build a charcuterie board? Some might think that it’s as simple as putting meat and cheese on a plate, however, we say it’s an art form (a very delicious art form). With some help from an expert like Chesley, it doesn’t have to be as intimidating as it seems! Let’s dive in with a step-by-step guide that will help you build an epic charcuterie board that is guaranteed to impress.
PICK YOUR CANVAS
In the art of charcuterie boards, bigger is always better (hello, more board means more snacks!). A natural choice may be a wooden cutting board, ornate plate, or serving platter. Remember, keep things modest if you’re entertaining on a budget! If you don’t have any boards or large plates, you can always opt to use your table as your canvas and throw down some brown paper.
TIME FOR CHEESE
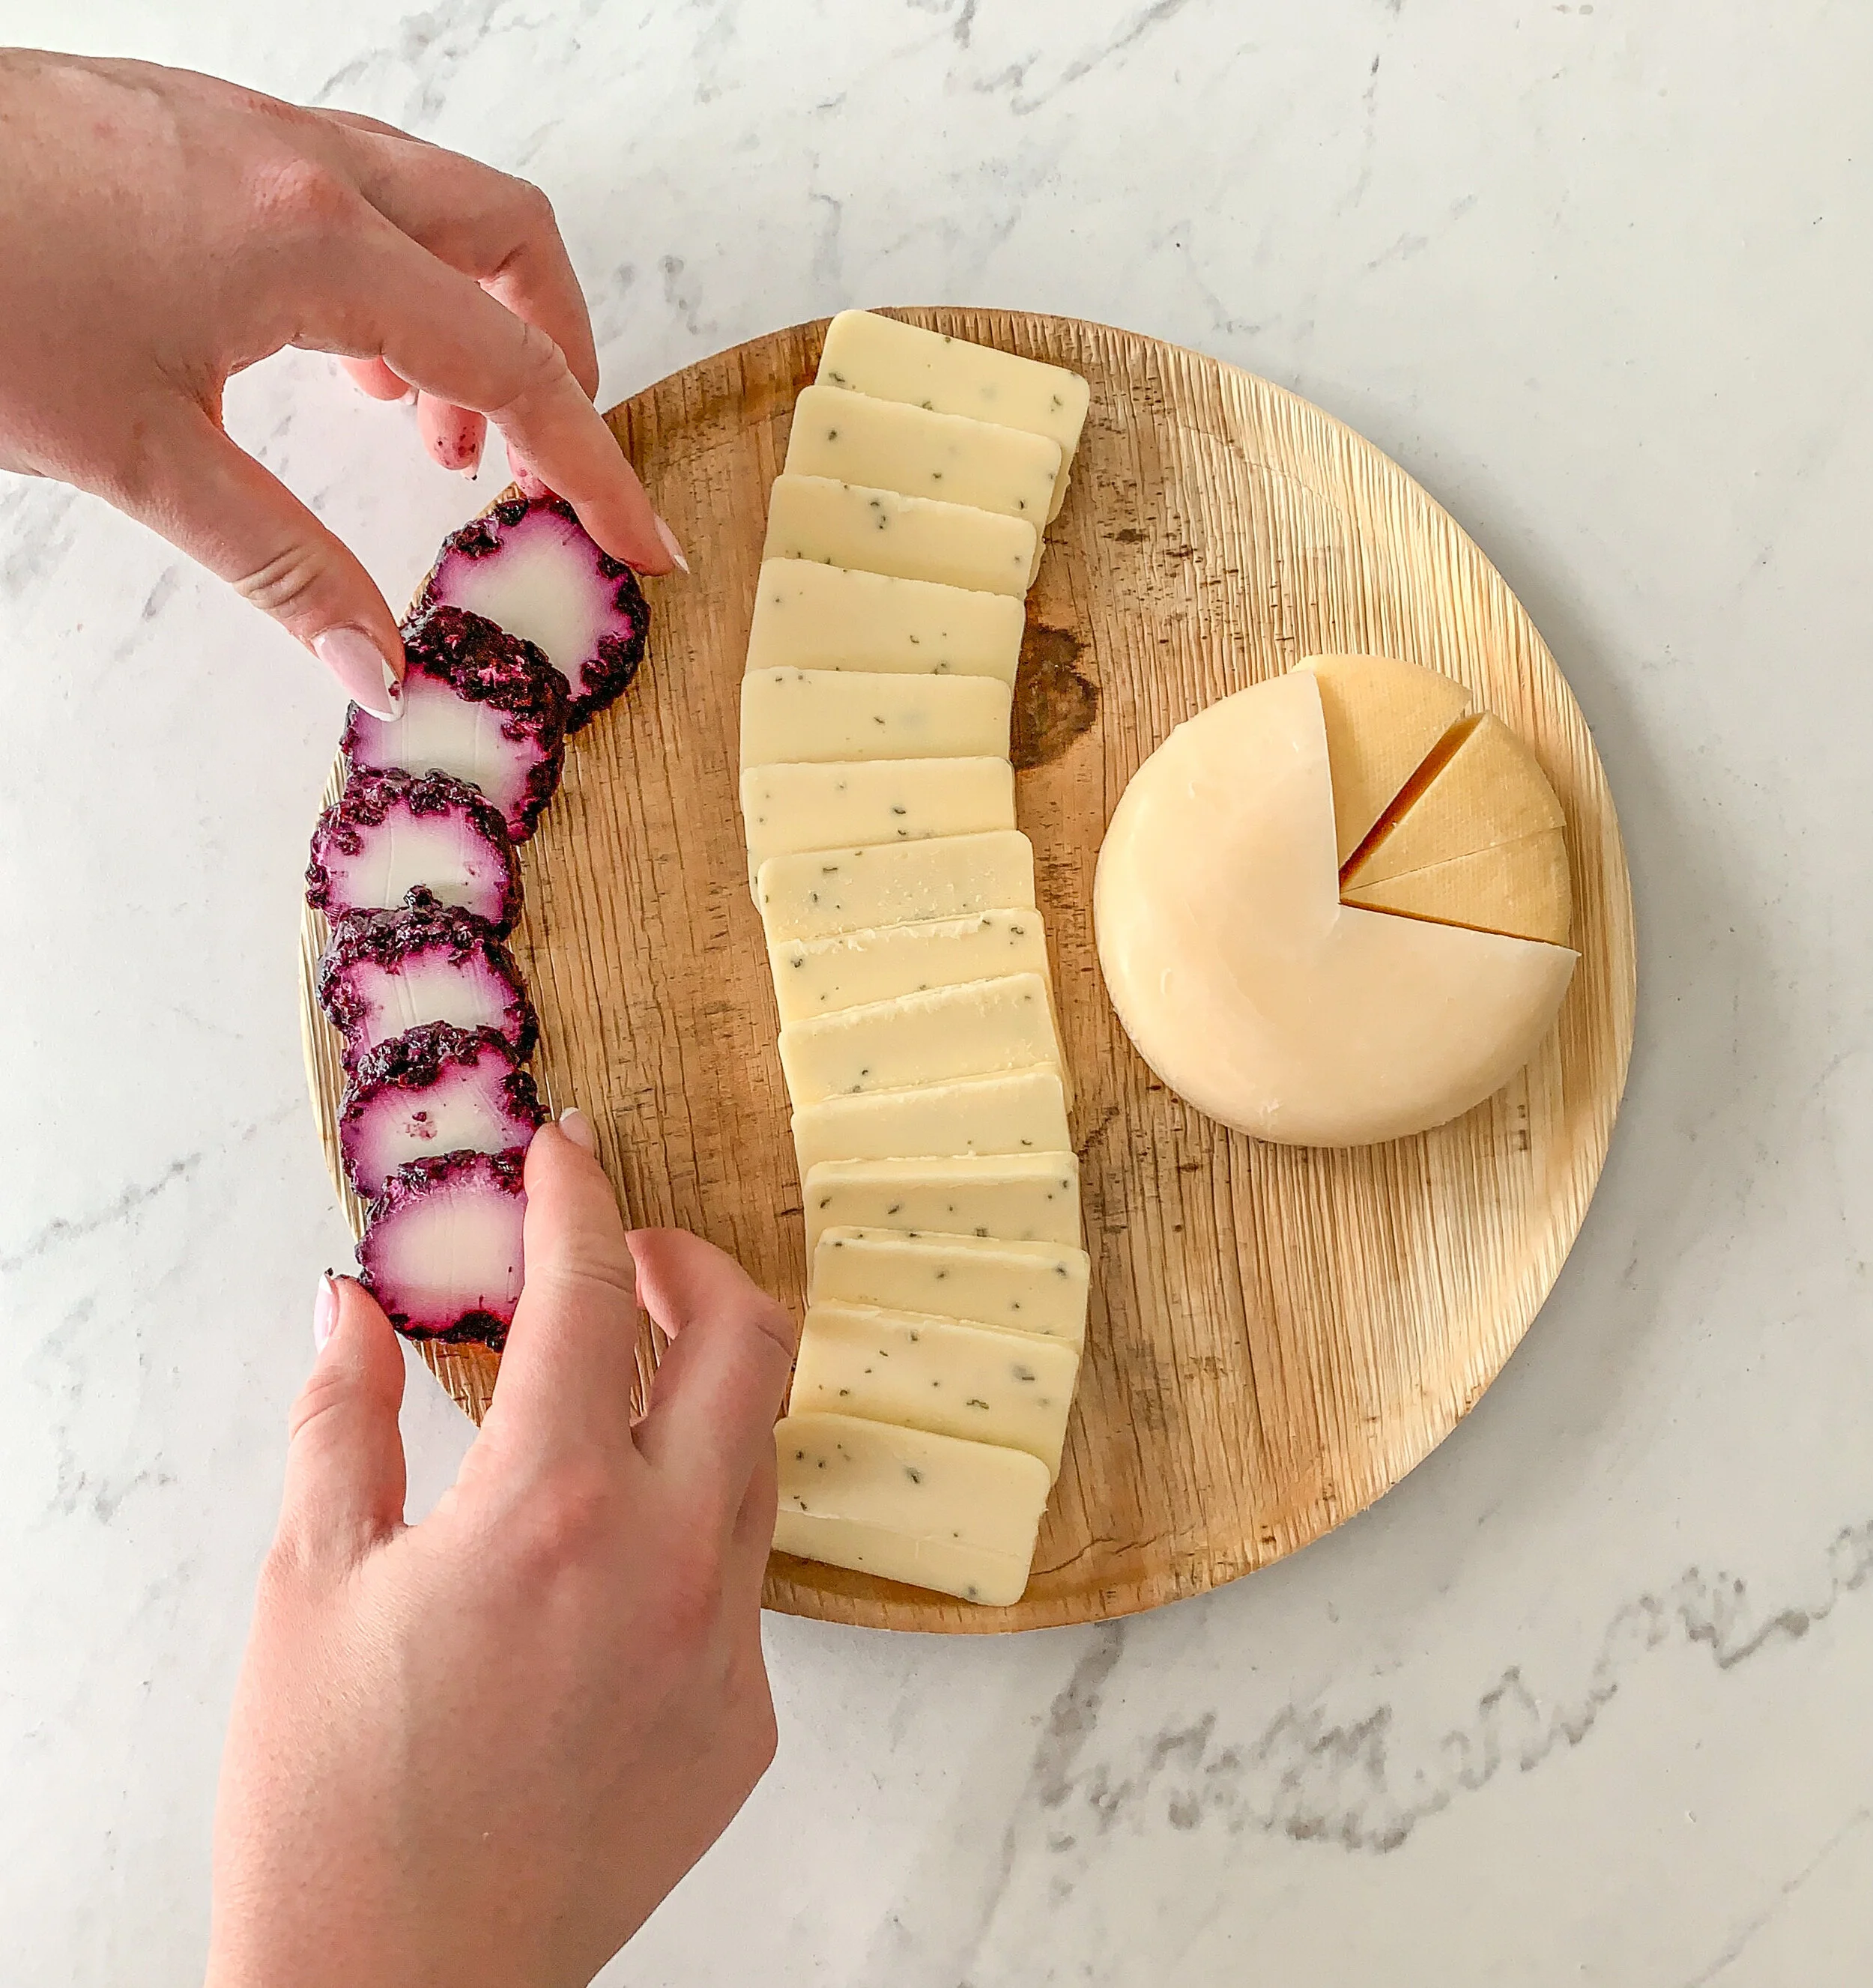
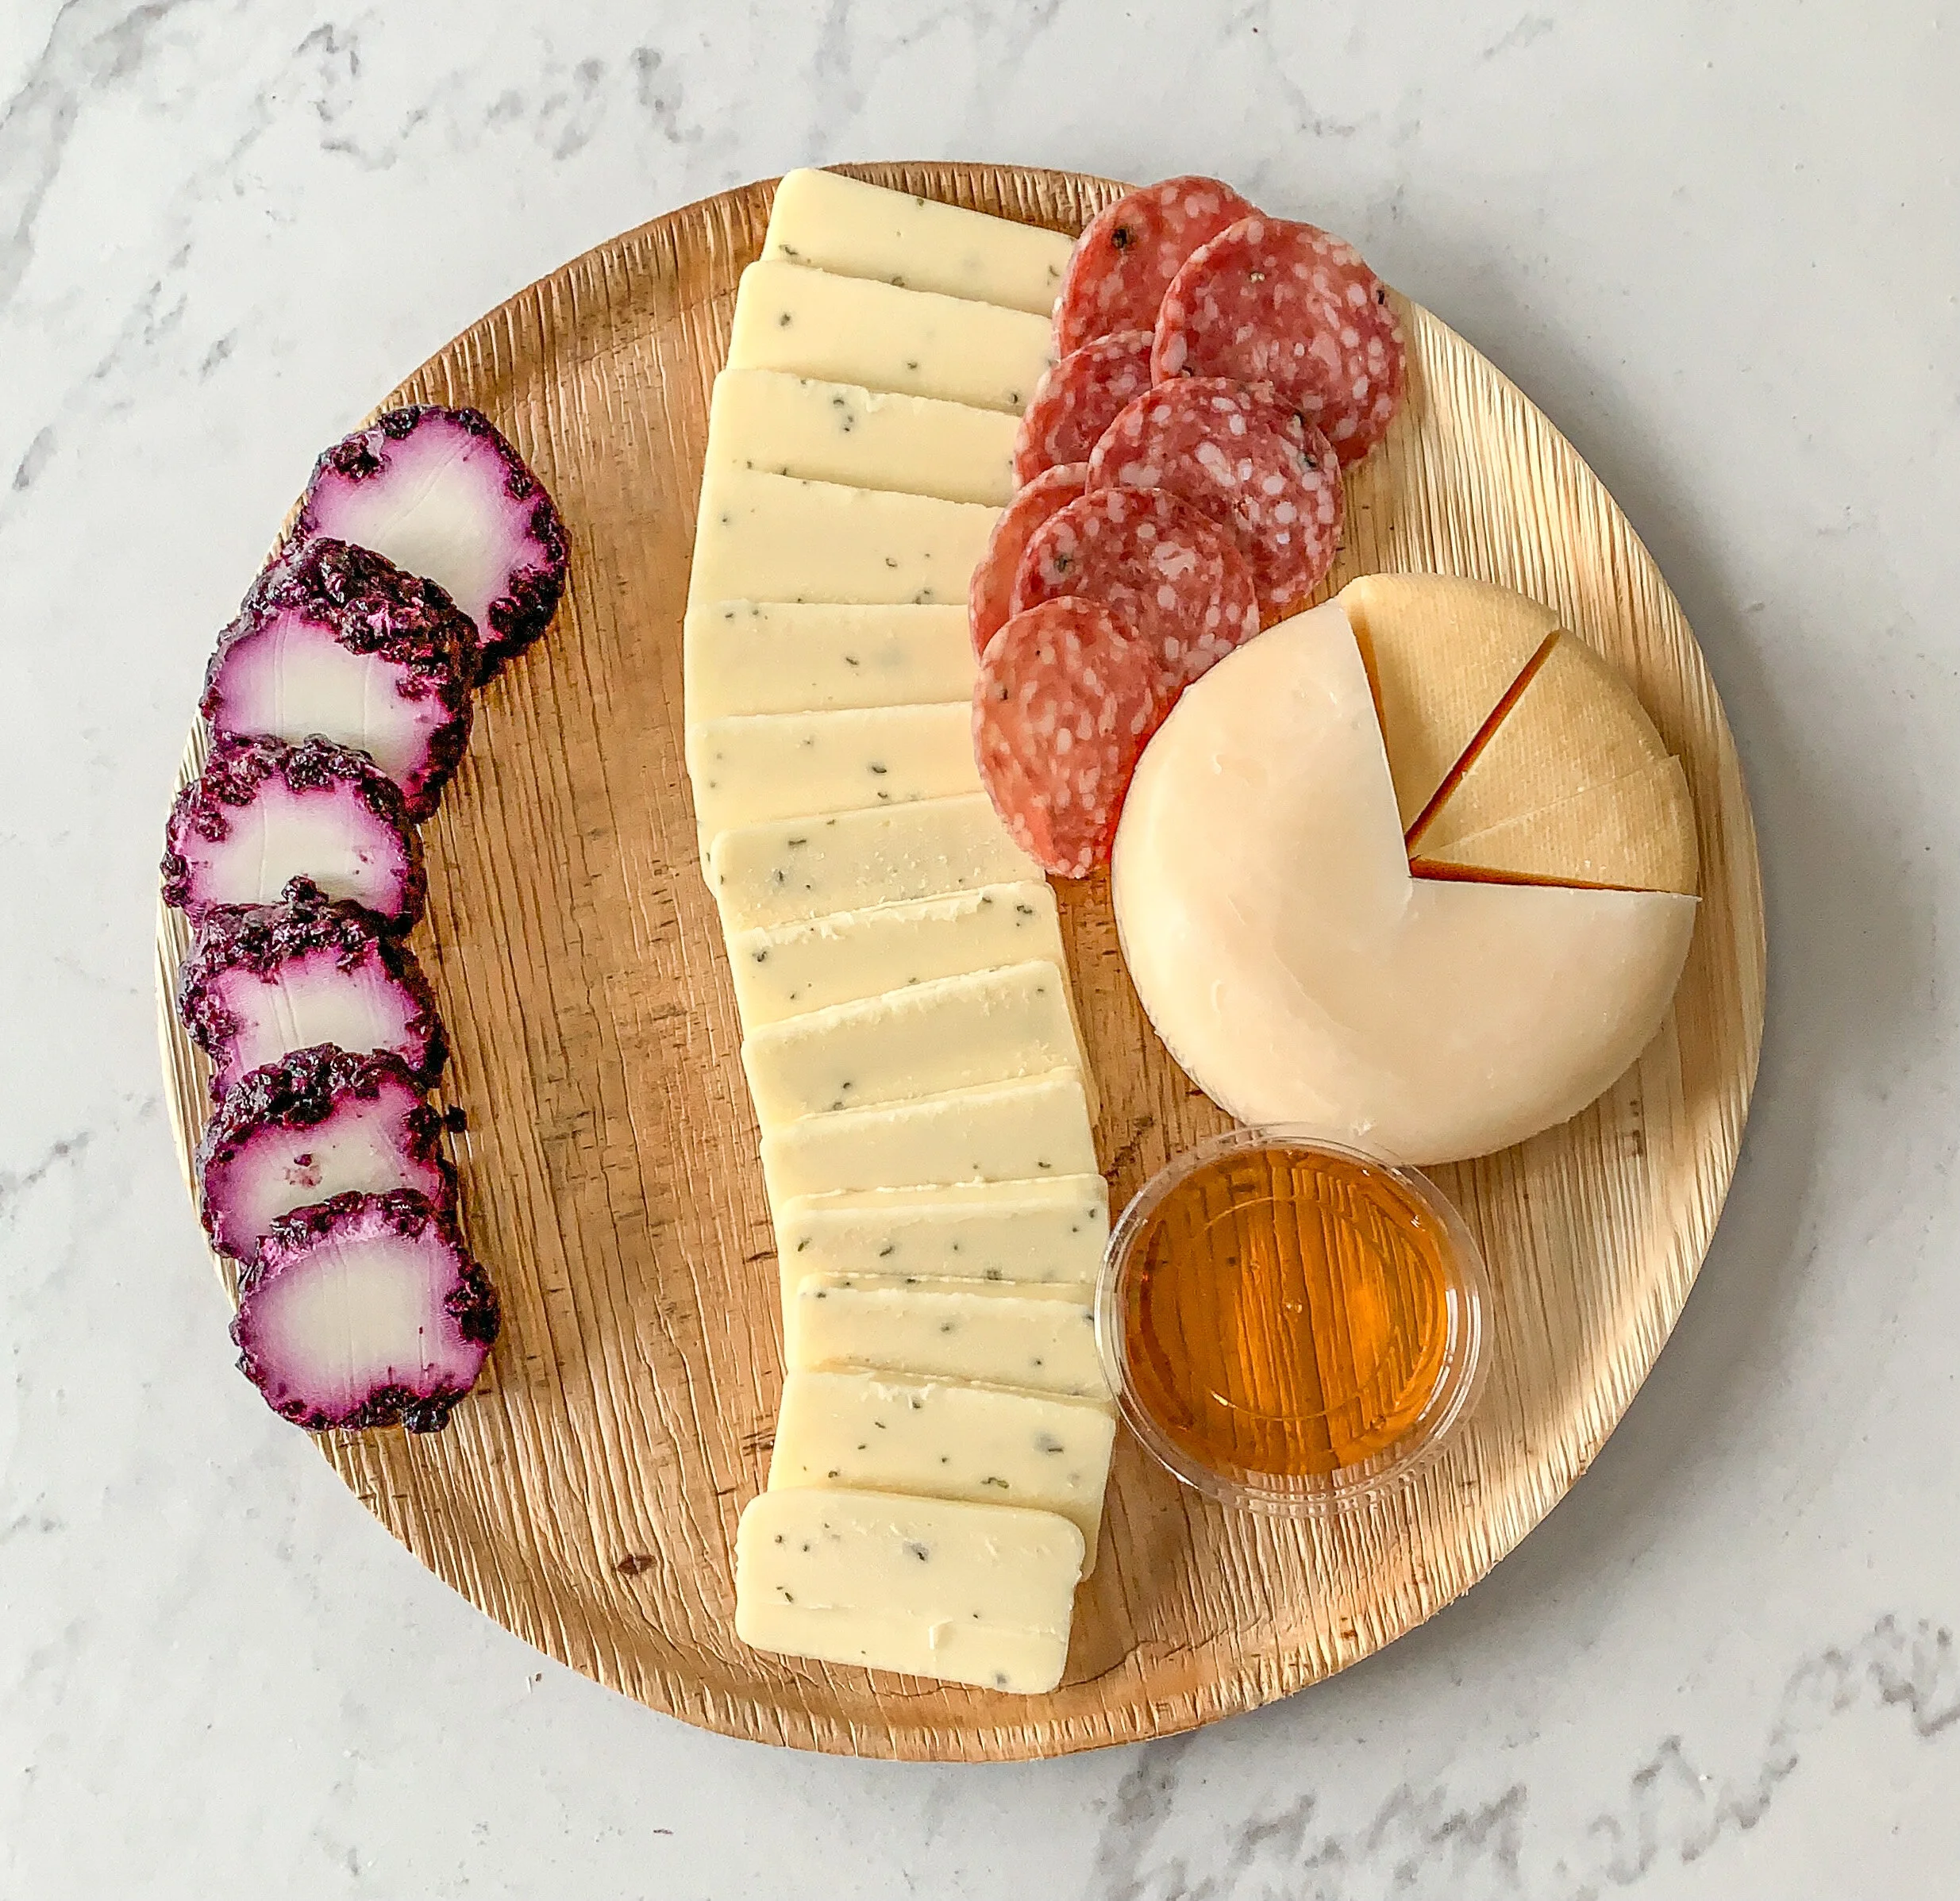
The best cheeses to include are your favorites. Start by placing them around the edges of your board, facing inwards. When choosing your cheeses, pick one from each general category:
Hard (Merlot Bellavatino)
Semi-hard (Castello Smoked Gouda)
Semi-soft (Havarti)
Soft (Goat)
“Stinky” (Gorgonzola/Blue)
The number of cheeses that you choose will depend on the size of the board and how many you are serving. These are just a few options!
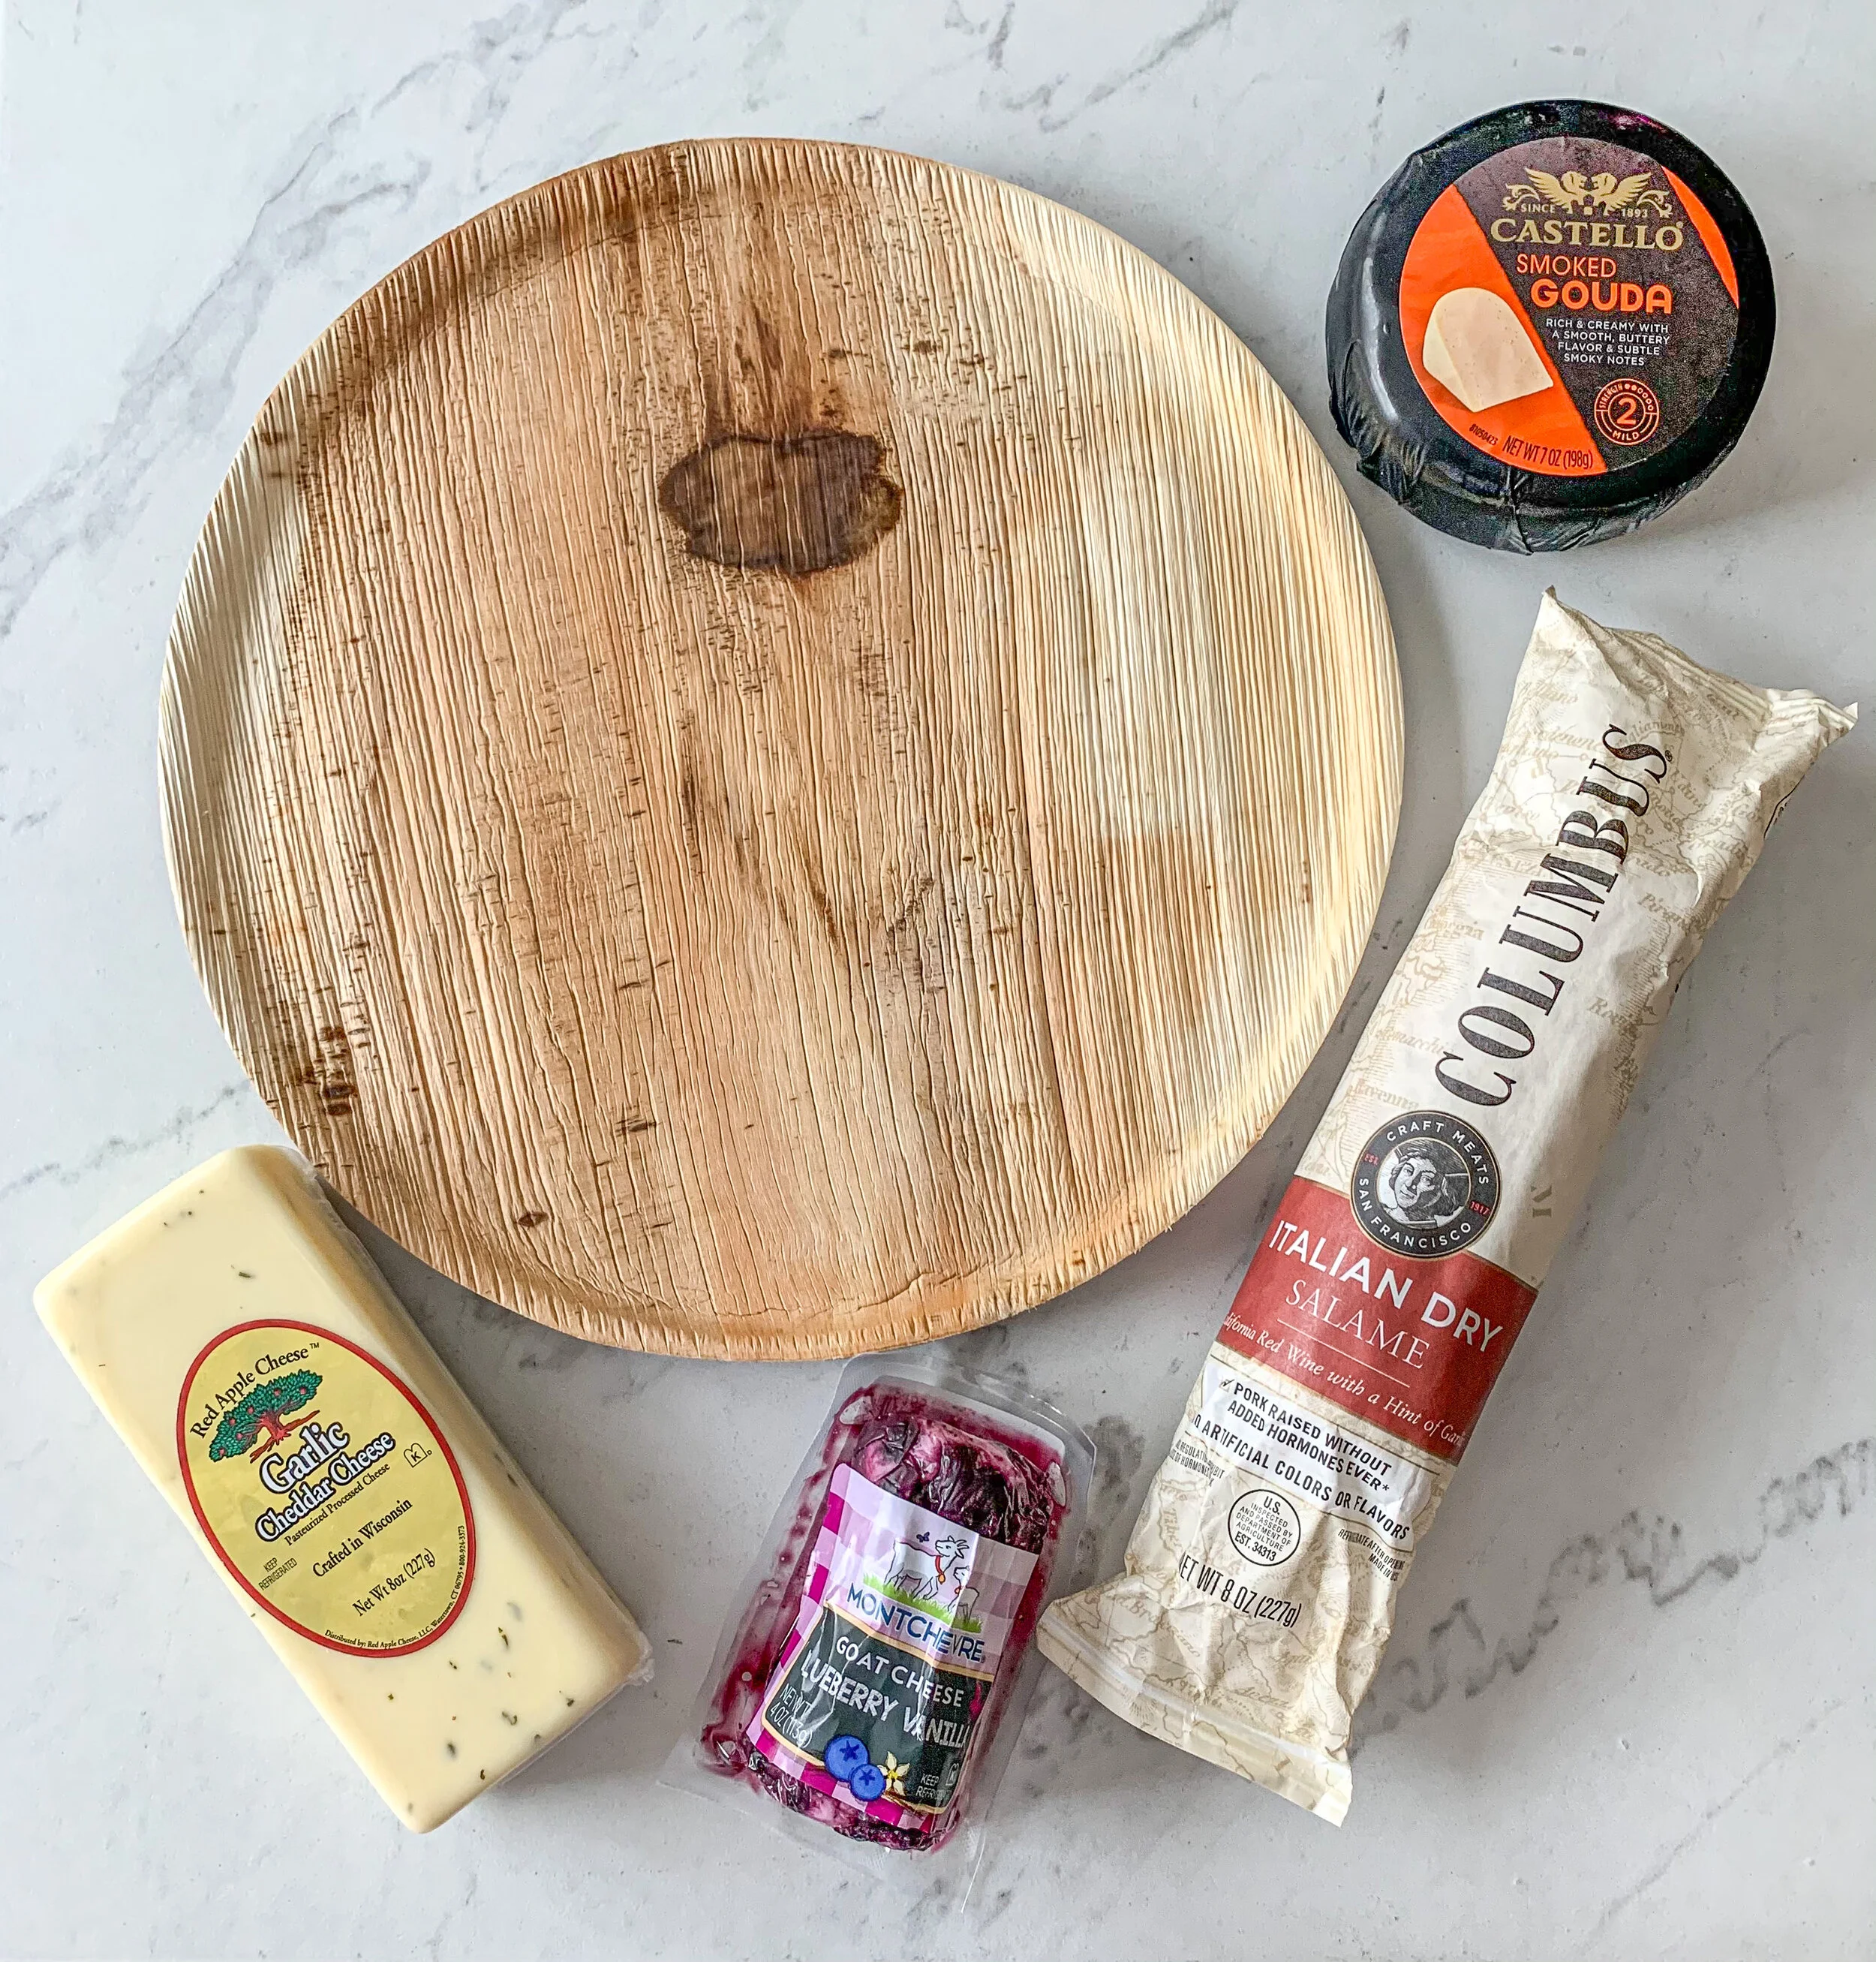
LET’S TALK ABOUT CURED MEATS
Just like cheese, include what you love! I love using a local salami and a salty Italian prosciutto because they’re delicious on their own but also pair well with just about everything. The goal with plating your meat selections is to create some nice visual texture on the board – my go-tos are salami roses and prosciutto ribbons!
FEELING FRUITY
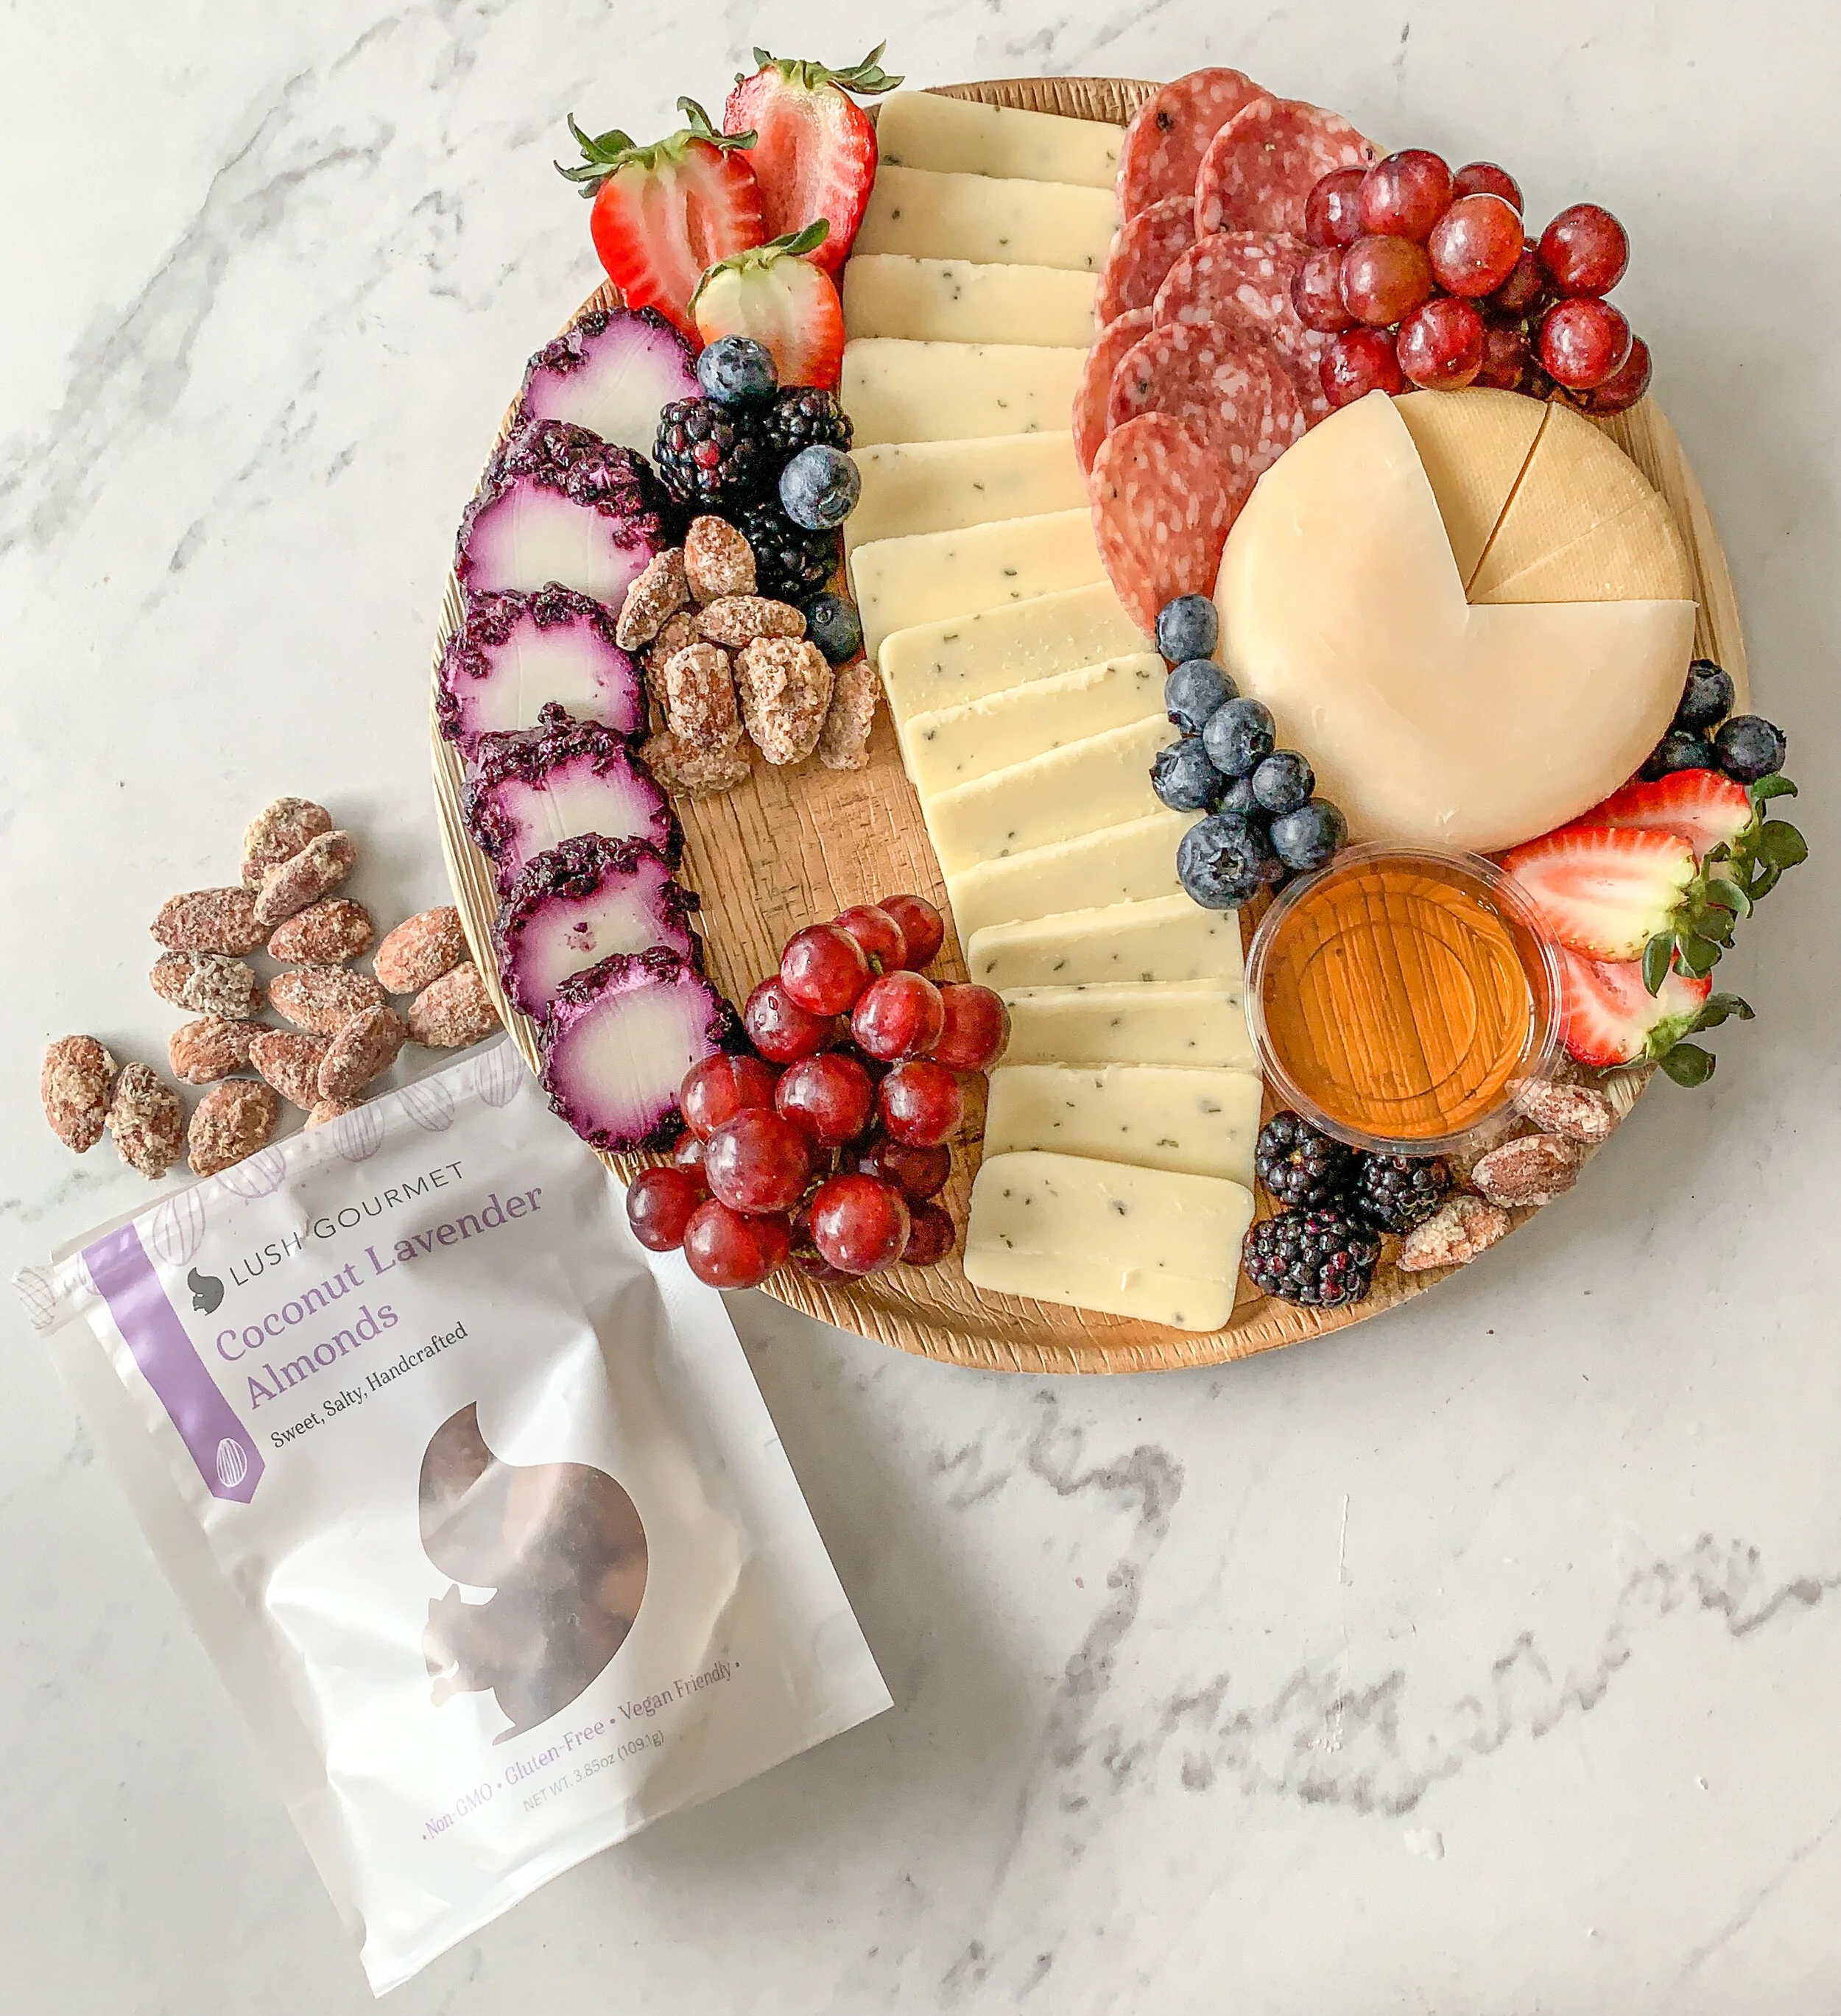
Fruits help fill in empty spaces on your board and can also add a nice pop of color! I like to incorporate seasonal items when they’re available, but my staples include grapes (red or green), ripe strawberries, blackberries, Michigan blueberries, and raspberries. Keep things cohesive: if you place a cluster of red grapes on one side of the board, place a smaller cluster of the same grapes on the opposite side.
JAMS, PRESERVES, HONEY, OH MY!
Oh, how magical a good honey drizzle can be on cheese and crackers! Add some sweetness with a jar or ramekin of jam or preserves. Bridge Street Market carries an entire selection of locally-made preserves from Cellar Door Preserves. For placement, I love to see these in the middle of the board for a beautiful centerpiece.
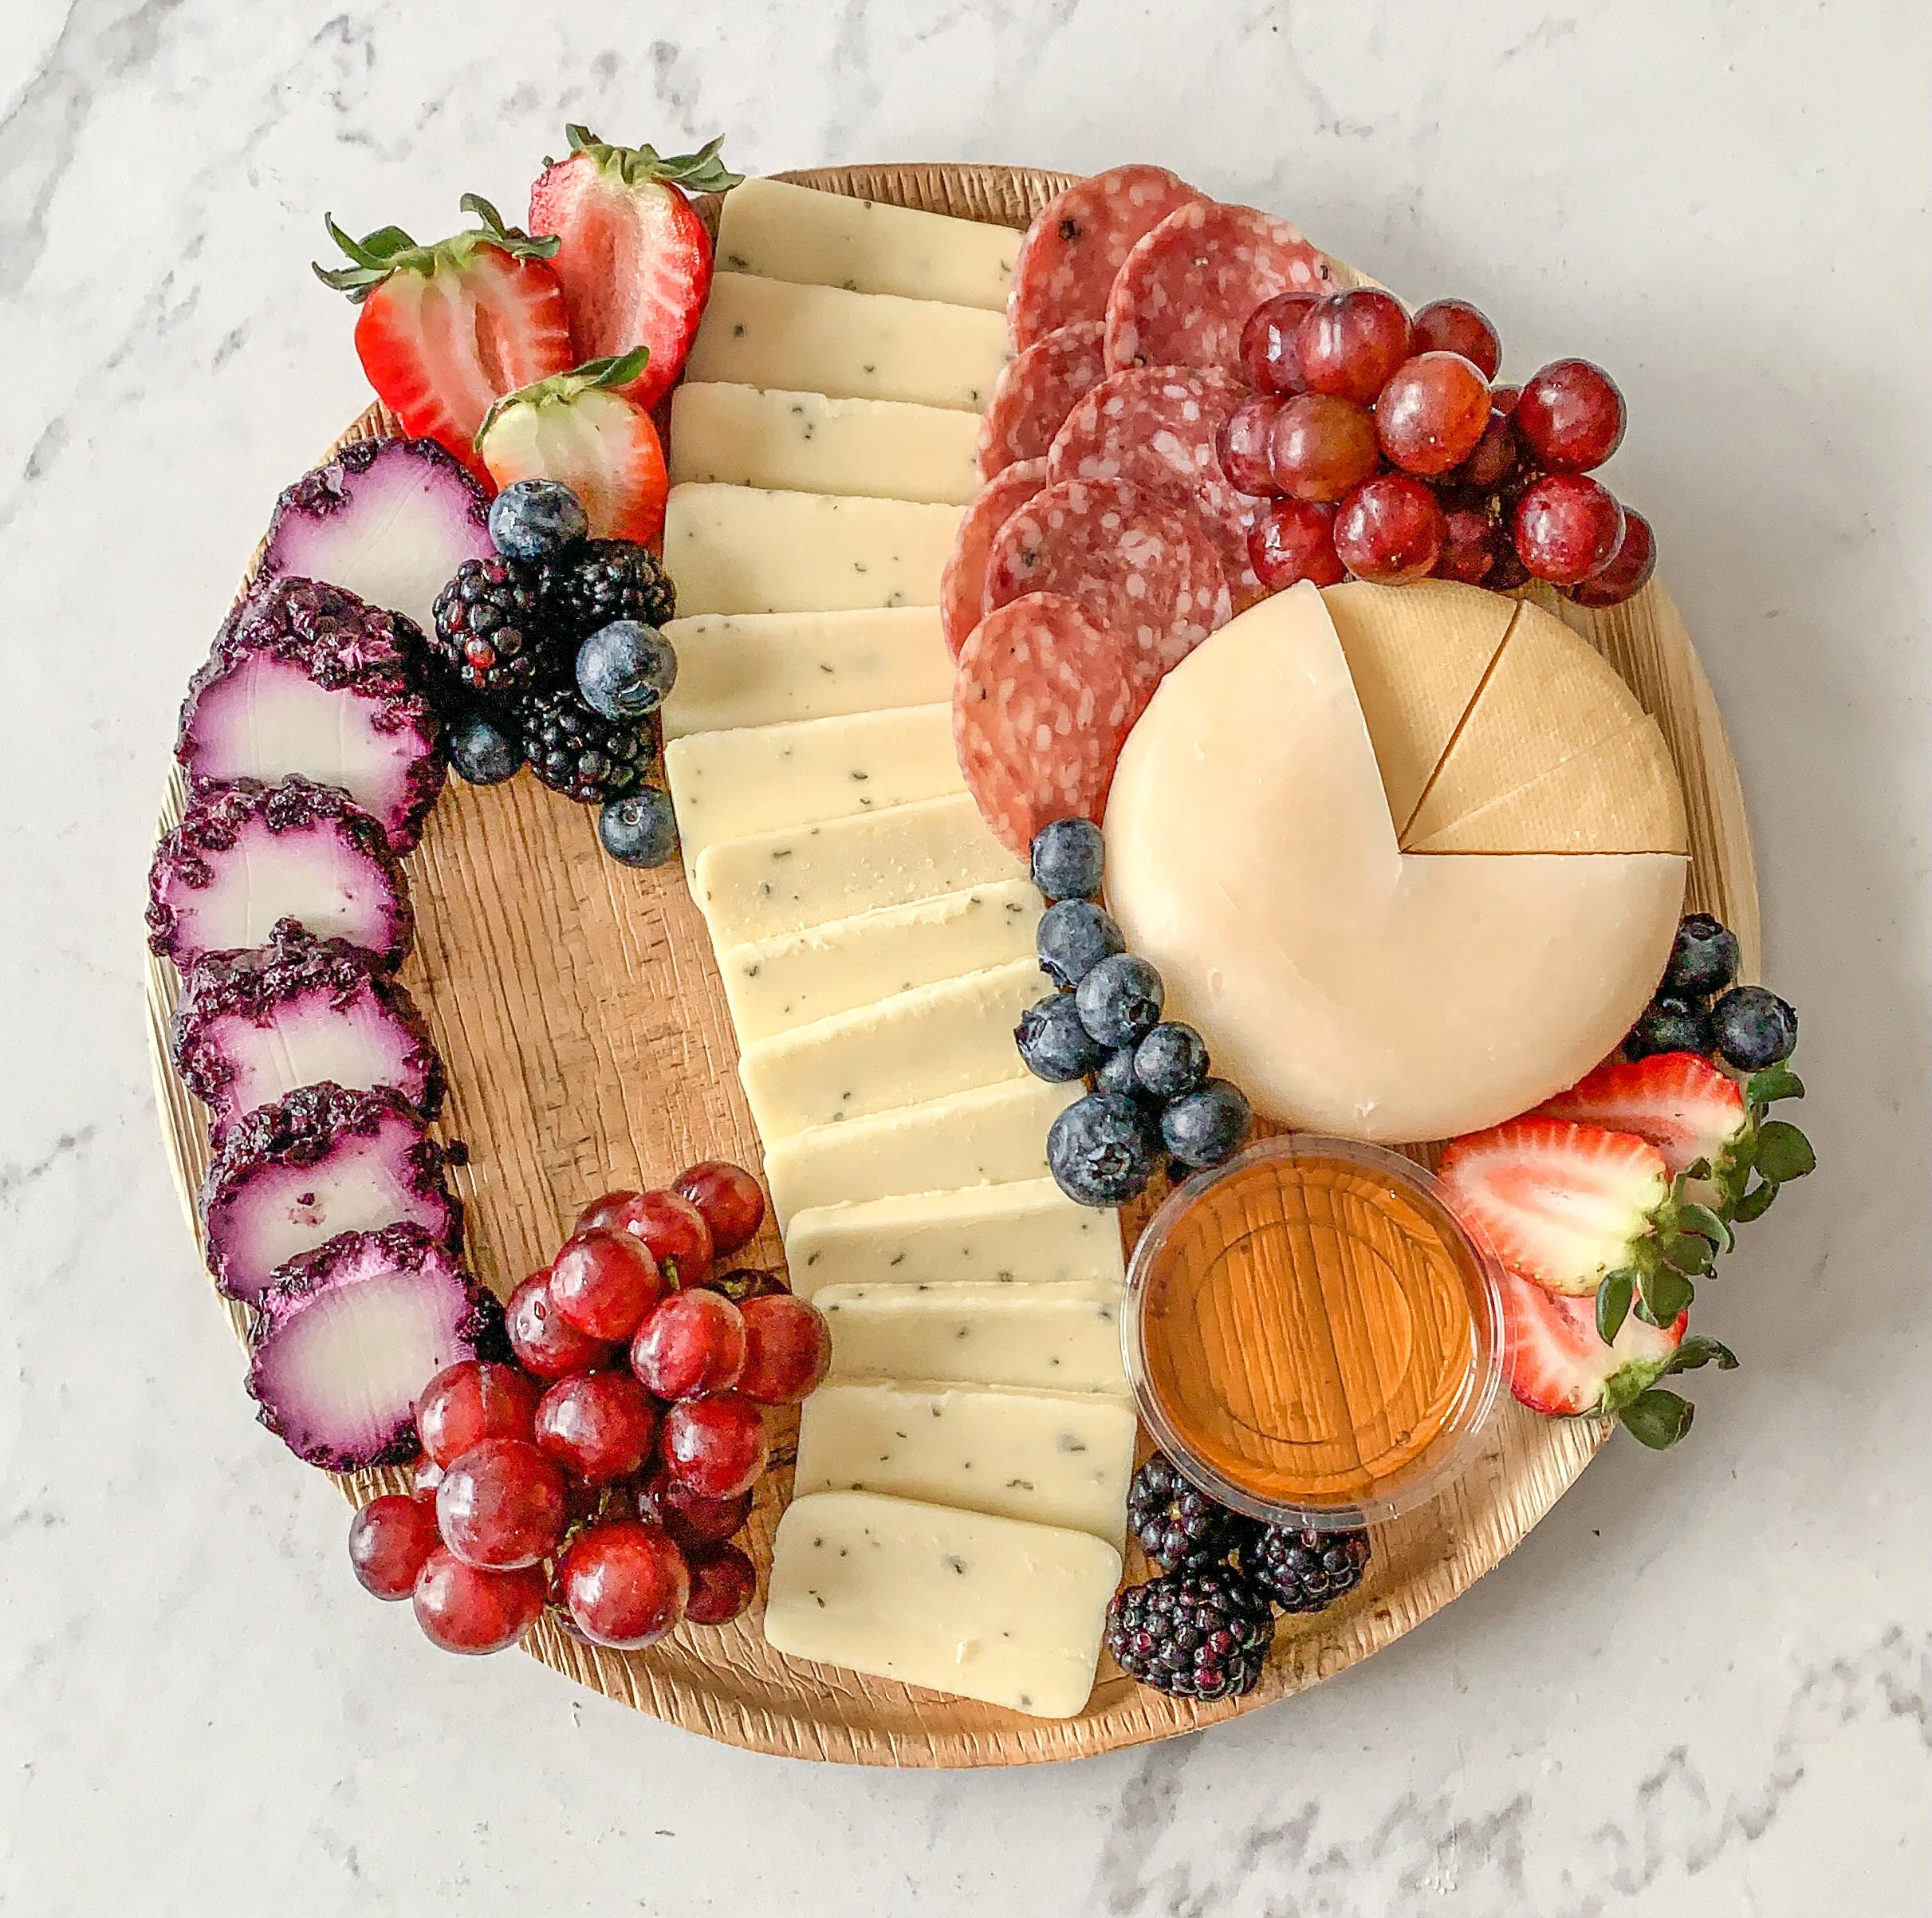
SOMETHING SALTY
If you haven’t caught onto this yet, it’s all about variety on your charcuterie board. If you’re a fan of olives or pickles, or pickled vegetables, place them in a ramekin and position just next to that pretty jar of local preserves in the center of the board.
FINISHING TOUCHES
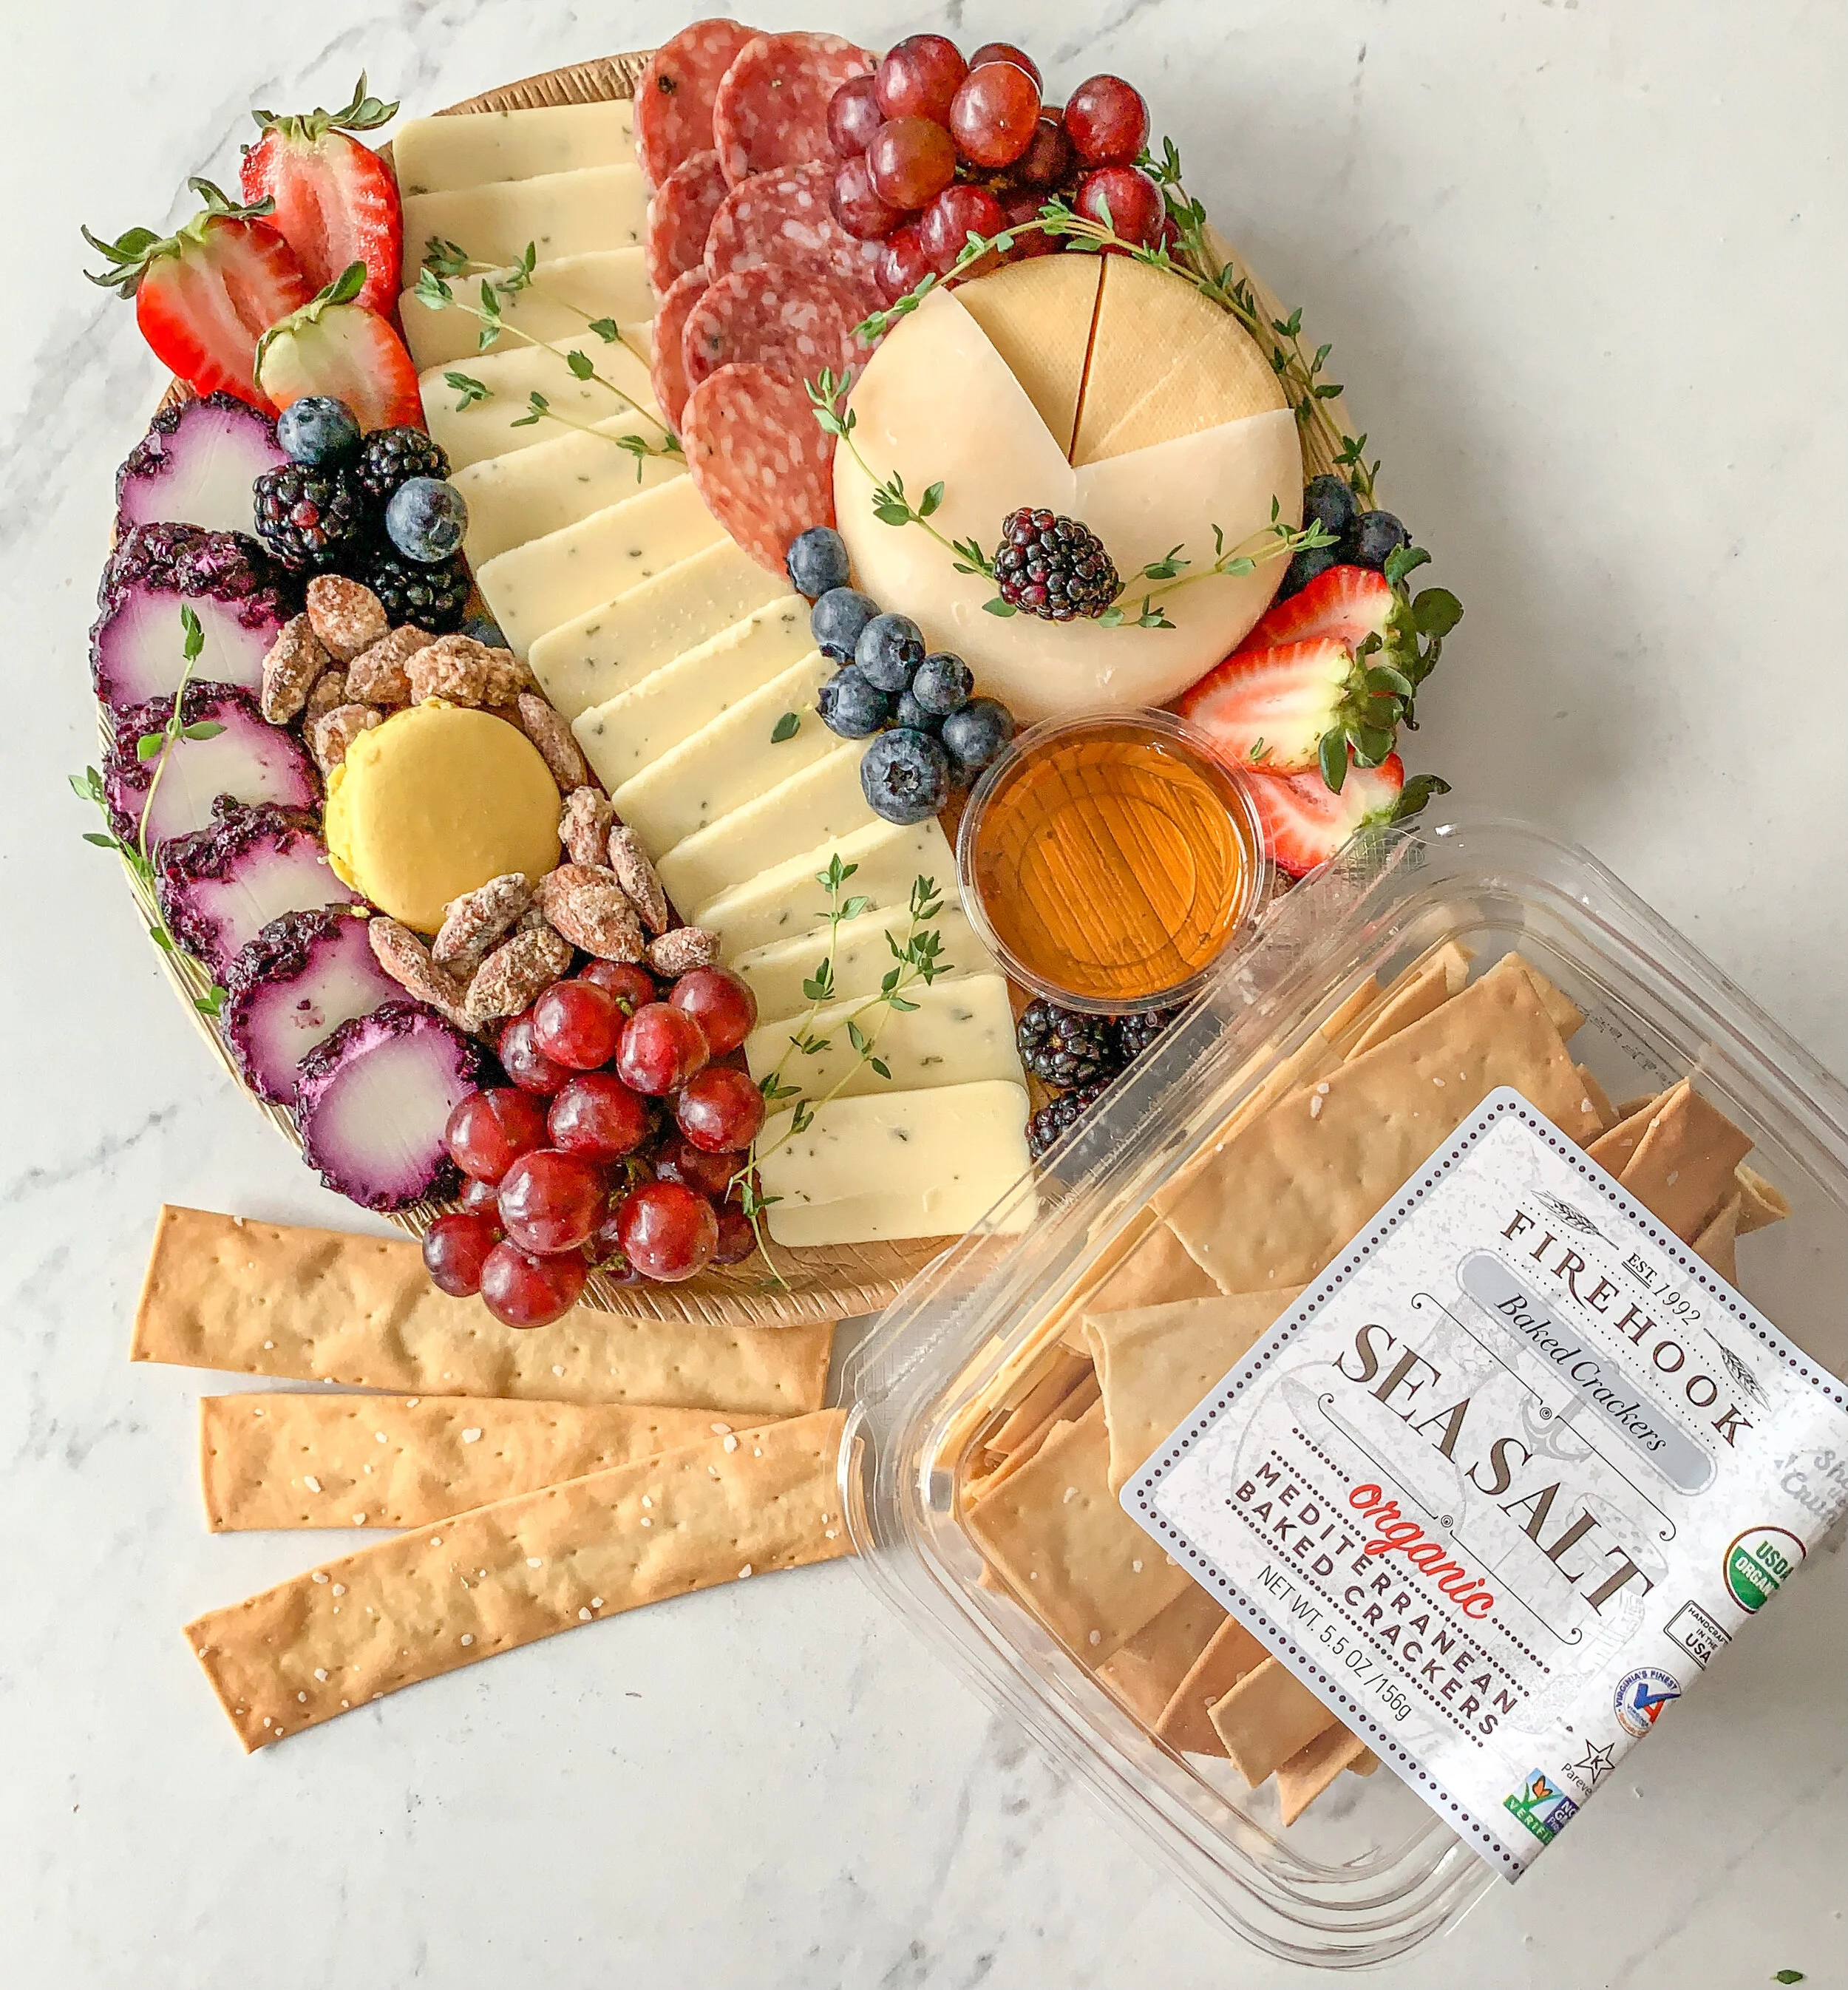
Lastly, use nuts to fill in any remaining open spaces. I personally love garlic and herb almonds, or a sweeter nut such as Coconut Lavender Almonds by Lush Gourmet. Bridge Street Market has dozens of nuts from Ferris Coffee & Nut Co. that you can find near the produce department. In these last moments, a fresh sprig of rosemary or thyme can add a nice pop of greenery to your board.
DESSERT? YES, PLEASE!
A sweet treat is never turned away (in my house, at least!). I love to add something sweet to my boards, like locally-made made macarons from LeBon Macaron, chocolate-covered nuts, or mini cookies from Monica’s Gourmet Cookies.
DON’T FORGET THE CRACKERS
Add some more crunch by including crackers or Triscuits. My pro tip would be to plate these separately from the board to prevent them from getting soggy due to any condensation (from the fruit or popping in and out of the refrigerator). If you do put them on the board, plate them on the edges, and avoid putting them next to any fruit, meat, or soft cheeses.
Voila! Take a step back and admire your hard work. If something looks off to you, move it! Nothing has a permanent place. Use your own creative judgement, and remember that no matter what it looks like, it’s sure to taste great. The best part of all this? Your board is *almost* too pretty to eat – but I’m sure you’ll get over that quickly.